Almost a year ago now we decided to embark on adding a Sauna to our back yard. For whatever reason Costco once in a while has a crazy cheap deal on the “Almost Heaven Saunas Morgan 4-person Outdoor Barrel Sauna”. I’ve researched saunas heavily and while purists don’t like barrel saunas the price was hard to beat, close to $2500 I think on the sale, though listed over $4000 as of today. Well over the course of winter during heavy rains the $300 tarp almost heaven sells proved to be quite lacking. It ends 4" short on each side so water gets in and we have water rings we can see inside. The water also drips down the side of the barrel and soaks in from the sides. This causes lots of swelling I think is the main issues outside the discoloration. Cedar is pretty good against rotting but I want this to last 20 years not 10.
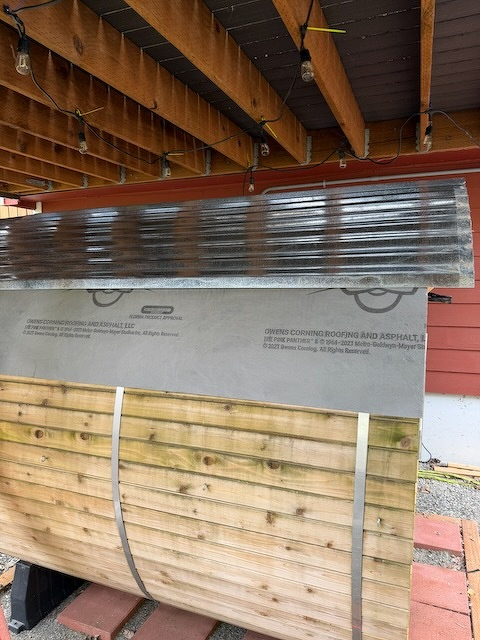
So I decided to put a roof on it. Surprisingly there’s not really kits available to do this anymore. I went a cheap route, corrugated steel. I purchased Owens Corning WeatherLock underlayment for waterproofing the top and corrugated galvanized steep 31 guage roof panels that are thin enough to flex pretty easy. Was close to $350 total at the time. It sat for a long while, I ordered in the wet season and wanted the wood dried out before I installed since I expect it will stay far drier and swell less than it used to .
The underlayment wasn’t terrible difficult to installl, I did it myself which added the complication of handling both ends. You just need to cut it to size then peel the stick bottom and apply it to the wood (of course clean off wood before hand).
It took 3 cut pieces for it, the top overlaps the two side pieces so I added the side pieces first. You want the overlap to ensure drips dont get pushed under somehow. Same with the steel. Once I Had that completed I used some 1" roofing screws that were self tapping and sealing and started with the top center piece of steel. Turned out these were far longer than I planned so I measured to a 4" overhang on the front then manually cut the back to 4" using some tin cutters. It was surprisingly easy to cut steel this thin.
I can’t say the back was perfectly cut but the front looks decent and I no longer have to worry about water leaking in. I’ll add I did have it run to the low side, to try and make sure water doesnt drip onto the widest part of the barrel. So I added a little turn screw underneath to push the metal away from the side of the barrel.
If anyone comes across this and wonder about this sauna model, It’s plenty hot for me. I get it up to 180F which takes about 50 minutes in summer and 1 hour and 20 minutes in winter (though the new roof may trap more heat?) It can do 190F but I have a problem I haven’t solved with the harvia heater triggering its overheat sensor and shutting down. I generally keep it at 180 as it’s enough to have me struggling after 12 minutes but I’m also dumping water on it to keep it humid in there. My kids like to join sometimes with cucumber on their eyes but I keep it around 140 for them right now.
It smells wonderful heated up, the cedar is very aromatic. The only thing missing is a bit of a privacy fence and outdoor shower. I absolutely love walking outside in the winter with steam just pouring off me. I don’t know if it’s helped me health at all but it makes my skin feel great.